大家好,欢迎来到IT知识分享网。
首先 我们来了解一下RxJS,RxJS是一个基于观察者模式的响应式编程库,它是ReactiveX的JavaScript版本。它提供了一组强大的操作符和工具,用于处理异步数据流。通过使用RxJS,开发者可以轻松地处理各种异步操作,如处理用户输入、处理网络请求、处理定时器等等。它使用Observable对象来表示数据流,并提供了各种操作符来转换、过滤和组合数据流中的值。RxJS的主要思想是将异步操作看作是一个数据流,并通过操作符来处理这个数据流,从而简化异步编程和数据流处理的复杂性。
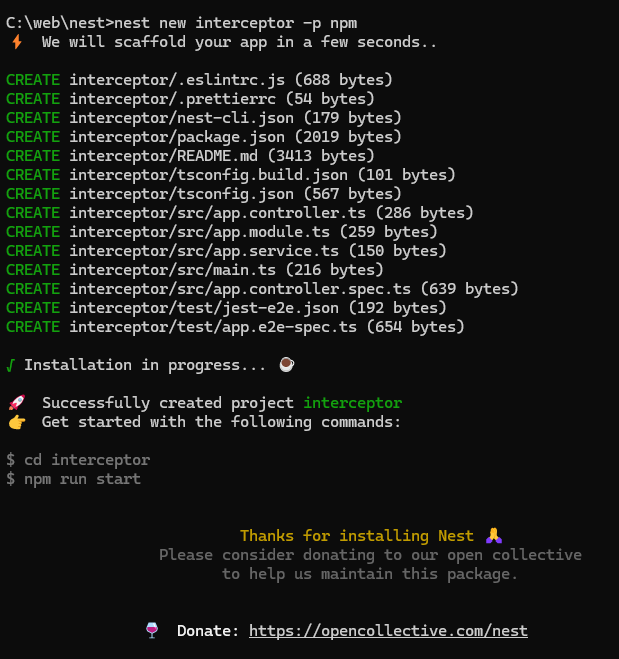
nest new interceptor -p npm
创建一个interceptor 实现接口耗时统计
nest g interceptor test --flat --no-spec import {
CallHandler, ExecutionContext, Injectable, NestInterceptor } from '@nestjs/common'; import {
Observable, tap } from 'rxjs'; / * TestInterceptor 类实现了 NestInterceptor 接口,用于拦截 NestJS 的 HTTP 请求。 * 它的主要作用是在请求处理完成后记录执行时间,以便于性能分析。 */ @Injectable() export class TestInterceptor implements NestInterceptor {
/ * intercept 方法是 NestInterceptor 接口的一部分,它定义了如何拦截请求。 * @param context 表示当前的执行上下文,可以从中获取关于请求的信息。 * @param next 一个 CallHandler 对象,代表接下来要执行的请求处理逻辑。 * @returns 返回一个 Observable,通过管道操作对请求的响应进行处理。 */ intercept(context: ExecutionContext, next: CallHandler): Observable<any> {
// 记录当前时间,用于计算请求处理时间 const now = Date.now(); / * 使用tap操作符来执行一个无副作用的观察,用于打印请求处理的耗时。 * * 这里通过console.log输出请求处理完成后的当前时间与请求开始时间的差值,以毫秒为单位, * 用于日志记录和性能调试。 */ return next.handle().pipe( tap(() => console.log(`After... ${
Date.now() - now}ms`)), ); } } 接着修改app.controller.ts:
import {
    Controller, Get, UseInterceptors } from '@nestjs/common'; import {
    AppService } from './app.service'; import {
    TestInterceptor } from './test.interceptor'; @Controller() export class AppController {
    constructor(private readonly appService: AppService) {
    } @Get() @UseInterceptors(TestInterceptor) getHello(): string {
    return this.appService.getHello(); } }
1、RxJS 的map
RxJS中的map操作符是一种数据转换操作符,它将源Observable发出的每个数据项都应用一个指定的投射函数,并返回一个新的Observable,该Observable发出投射函数的结果。
我们再生成一个interceptor:
nest g interceptor map --flat --no-spec
修改 map.interceptor.ts 使用map operator 实现地返回数据进行修改:
import {
    CallHandler, ExecutionContext, Injectable, NestInterceptor } from '@nestjs/common'; import {
    Observable, map } from 'rxjs'; @Injectable() export class MapInterceptor implements NestInterceptor {
    intercept(context: ExecutionContext, next: CallHandler): Observable<any> {
    return next.handle().pipe( map((data) => {
    return {
    code: 200, message: 'success', data }; }), ); } }
2、RxJS 的tap
RxJS 中的tap操作符是用来在Observable的执行过程中插入一些副作用的操作符。它类似于do操作符,但tap更加灵活,并且可以在Observable的各个阶段添加副作用。
再生成一个interceptor:
nest g interceptor tap --flat --no-spec
修改tap.interceptor.ts:
import {
    CallHandler, ExecutionContext, Injectable, Logger, NestInterceptor } from '@nestjs/common'; import {
    Observable, tap } from 'rxjs'; import {
    AppService } from './app.service'; @Injectable() export class TapInterceptor implements NestInterceptor {
    constructor(private appService: AppService) {
    } private readonly logger = new Logger(TapInterceptor.name); intercept(context: ExecutionContext, next: CallHandler): Observable<any> {
    return next.handle().pipe(tap((data) => {
    // 这里是模拟 更新缓存的操作 this.appService.getHello(); this.logger.log(`log something`, data); })) } }
在app.controller.ts增加接口:
@Get('aaa') @UseInterceptors(TapInterceptor) aaa() {
    return 'aaa' }
访问 http://localhost:3000/aaa
用的是 Nest 内置的 Logger,所以打印格式如下:
3、RxJS 的catchError
RxJS的catchError操作符是用来捕获Observable流中的错误,并返回一个新的Observable流。它类似于try-catch语句,可以在发生错误时执行特定的操作或提供备用值。
我们再生成一个 interceptor:
nest g interceptor catch-error --flat --no-spec 使用 catchError 处理抛出的异常:
import {
    CallHandler, ExecutionContext, Injectable, Logger, NestInterceptor } from '@nestjs/common'; import {
    Observable, catchError, throwError } from 'rxjs'; @Injectable() export class CatchErrorInterceptor implements NestInterceptor {
    private readonly logger = new Logger(CatchErrorInterceptor.name) intercept(context: ExecutionContext, next: CallHandler): Observable<any> {
    return next.handle().pipe(catchError(err => {
    this.logger.error(err.message, err.stack) return throwError(() => err) })) } }
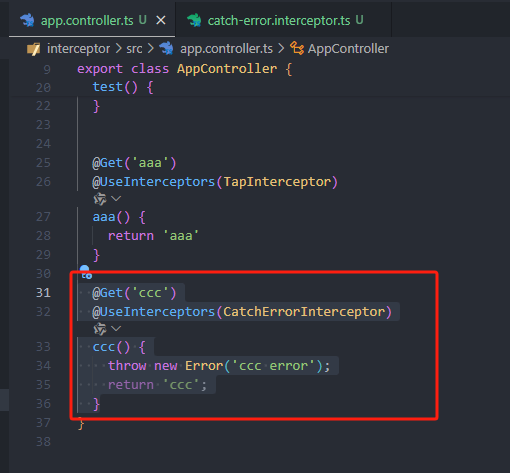
增加接口:
@Get('ccc') @UseInterceptors(CatchErrorInterceptor) ccc() {
    throw new Error('ccc error'); return 'ccc'; }
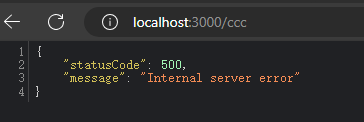
浏览器访问 http://localhost:3000/ccc
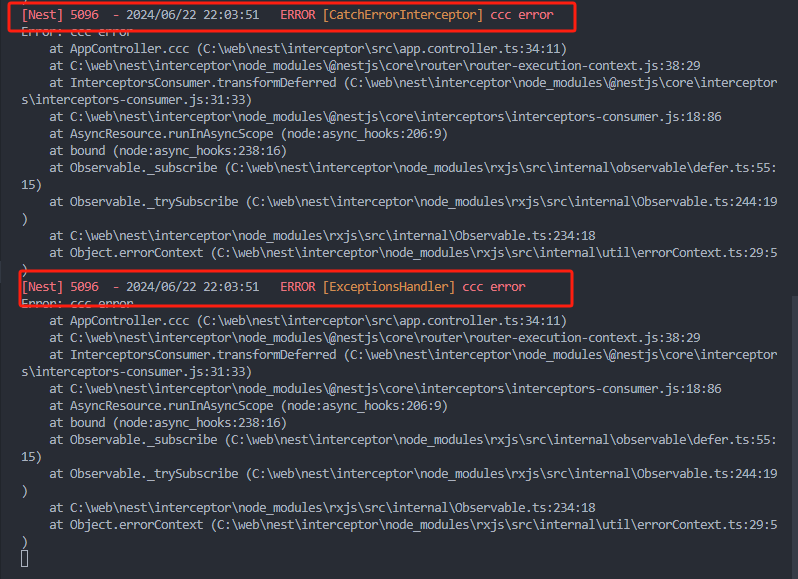
这里重新了2次异常 第一个是interceptor 里打印的 第二个是exception filter 处理
4、RxJS 的timeout
在 RxJS 中,timeout 操作符用于设置一个超时时间,如果源 Observable 在指定的时间内没有发出下一个值,就会抛出一个错误。
我们再创建一个 interceptor:
nest g interceptor timeout --flat --no-spec 修改 interceptor: 实现3s 没收到消息的时候抛一个 TimeoutError
import {
    CallHandler, ExecutionContext, Injectable, NestInterceptor, RequestTimeoutException } from '@nestjs/common'; import {
    Observable, TimeoutError, catchError, throwError, timeout } from 'rxjs'; @Injectable() export class TimeoutInterceptor implements NestInterceptor {
    intercept(context: ExecutionContext, next: CallHandler): Observable<any> {
    return next.handle().pipe( timeout(4000), catchError((err) => {
    if (err instanceof TimeoutError) {
    console.log(err); return throwError(() => new RequestTimeoutException()); } return throwError(() => err); }), ); } }
增加一个接口:
@Get('ddd') @UseInterceptors(TimeoutInterceptor) async ddd() {
    await new Promise(resolve => setTimeout(resolve, 5000)) return 'ddd' }
5、全局 interceptor 依赖注入
修改 main.ts 全局使用 TestInterceptor
import {
    NestFactory } from '@nestjs/core'; import {
    AppModule } from './app.module'; import {
    TestInterceptor } from './test.interceptor'; async function bootstrap() {
    const app = await NestFactory.create(AppModule); app.useGlobalInterceptors(new TestInterceptor()) await app.listen(3000); } bootstrap();
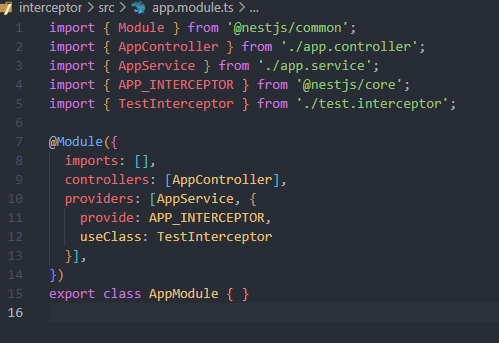
修改 app.module.ts 在AppModule注入TestInterceptor
import {
    Module } from '@nestjs/common'; import {
    AppController } from './app.controller'; import {
    AppService } from './app.service'; import {
    APP_INTERCEPTOR } from '@nestjs/core'; import {
    TestInterceptor } from './test.interceptor'; @Module({
    imports: [], controllers: [AppController], providers: [AppService, {
    provide: APP_INTERCEPTOR, useClass: TestInterceptor }], }) export class AppModule {
    }
最后我们再加个接口
@Get('eee') eee() {
    return 'eee' }
免责声明:本站所有文章内容,图片,视频等均是来源于用户投稿和互联网及文摘转载整编而成,不代表本站观点,不承担相关法律责任。其著作权各归其原作者或其出版社所有。如发现本站有涉嫌抄袭侵权/违法违规的内容,侵犯到您的权益,请在线联系站长,一经查实,本站将立刻删除。 本文来自网络,若有侵权,请联系删除,如若转载,请注明出处:https://haidsoft.com/117352.html


