大家好,欢迎来到IT知识分享网。
目录
一:Http、Https是什么
二:搭建web服务器
1.查看步骤
安装nginx软件: nginx是web服务器软件,可以用来搭建网站https://nginx.org/en/linux_packages.html(这个网站是官方网站,有安装的步骤)
2.操作
第1步: 安装yum-utils工具
[root@localhost dhcp]# sudo yum install yum-utils
第2步: 新建文件用于存放安装源
[root@localhost dhcp]# vim /etc/yum.repos.d/nginx.repo 路径不要错了
将这一块复制粘贴进nginx.repo 文本文件
第3步: 安装nginx
root@localhost dhcp]# yum install nginx -y
第4步: 启动nginx并且设置开机自启
[root@localhost dhcp]# service nginx start Redirecting to /bin/systemctl start nginx.service [root@localhost dhcp]# ps aux|grep nginx root 17681 0.0 0.0 49064 1160 ? Ss 15:21 0:00 nginx: master process /usr/sbin/nginx -c /etc/nginx/nginx.conf nginx 17682 0.0 0.0 49460 1900 ? S 15:21 0:00 nginx: worker process nginx 17683 0.0 0.0 49460 1900 ? S 15:21 0:00 nginx: worker process root 17685 0.0 0.0 980 pts/0 S+ 15:21 0:00 grep --color=auto nginx [root@localhost dhcp]# netstat -anplut|grep nginx tcp 0 0 0.0.0.0:80 0.0.0.0:* LISTEN 17681/nginx: master 可以看到nginx监听了80端口
第5步: 设置防火墙规则,开放80和443端口
第六步:查看设置的规则
必须先重新加载firewalld规则
[root@localhost dhcp]# firewall-cmd –reload
success
[root@localhost dhcp]# firewall-cmd –list-all
public (active)
target: default
icmp-block-inversion: no
interfaces: ens33
sources:
services: dhcp dhcpv6-client http ssh 这里就多了一个http
ports:
protocols:
masquerade: no
forward-ports:
source-ports:
icmp-blocks:
rich rules:
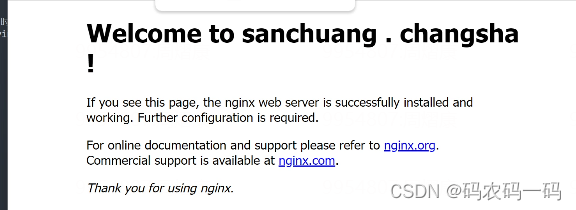
第6步: 测试,访问web服务
查看自己的ip地址,从windows里访问
测试结果如图
3.插入图片
第一步:进入首页文件
进入nginx的存放网页文件的目录
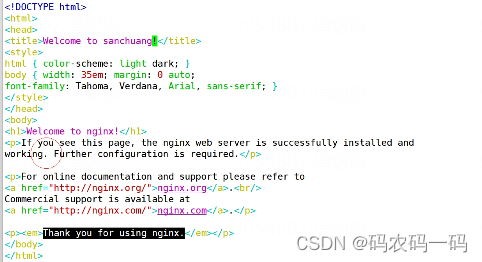
效果如图
第二步:装软件传图片
上传图片feng.jpg和wen.jpg到linux系统里的/usr/share/nginx/html/目录
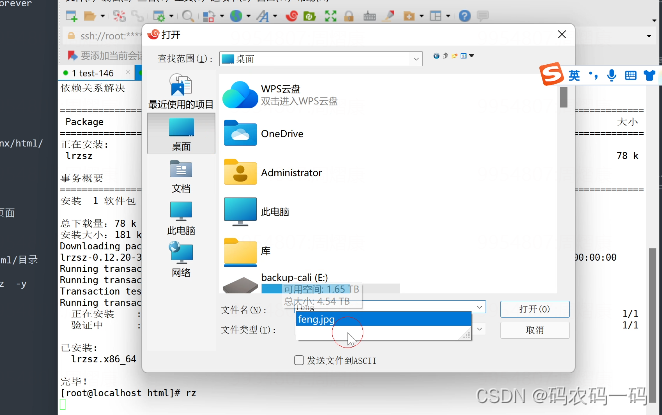
[root@localhost html]# yum install lrzsz -y 这个软件和Xftp一样可以传文件
[root@localhost html]# rz 装完后输入rz
点击打开以后会默认传送到当前目录上
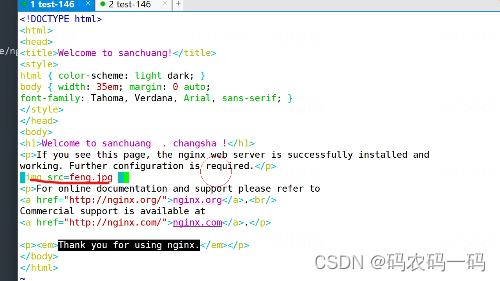
第三步: 加入图片
在p标签下边加入一下代码,同时限定长度
<img src=feng.jpg width=”400″>
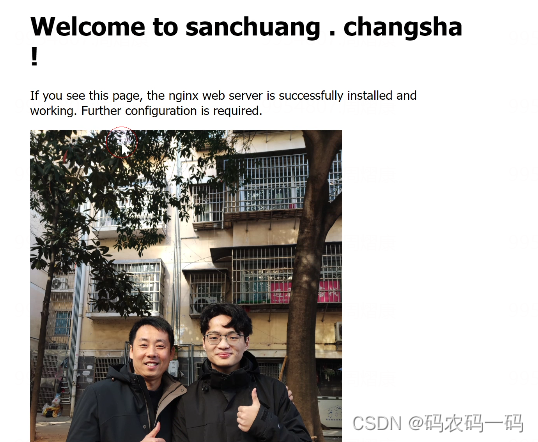
第四步:测试
说明以及制作好网站了(静态网页:固定文字固定图片)
免责声明:本站所有文章内容,图片,视频等均是来源于用户投稿和互联网及文摘转载整编而成,不代表本站观点,不承担相关法律责任。其著作权各归其原作者或其出版社所有。如发现本站有涉嫌抄袭侵权/违法违规的内容,侵犯到您的权益,请在线联系站长,一经查实,本站将立刻删除。 本文来自网络,若有侵权,请联系删除,如若转载,请注明出处:https://haidsoft.com/129565.html


