大家好,欢迎来到IT知识分享网。
简单记录一下微信公众号之订阅号的开发。
首先是官网地址:https://mp.weixin..com/
首先要注册用户,注册登录进来之后,我们找到接口权限,由于是个人的,权限很少,能做的事非常少,如下图。
这个时候,为了我们开发者使用,我们去使用测试的。
退出账号,找到开发文档
我们找到接口权限,可以看到,这里的权限较高,方便我们开发使用
点进去,扫码登录
1、开始接入,该地址是我用内网穿透工具映射到本地80端口地址,详情可见https://developers.weixin..com/doc/offiaccount/Basic_Information/Access_Overview.html
ps:正式的地址:https://mp.weixin..com/
验证消息的确来自微信服务器,返回相应的echostr即可(完整的需要进行排序加密比较)
@GetMapping("/verify") public String verify_wx_token(HttpServletRequest request, HttpServletResponse response) throws UnsupportedEncodingException{ request.setCharacterEncoding("UTF-8"); String signature = request.getParameter("signature"); String timestamp = request.getParameter("timestamp"); String nonce = request.getParameter("nonce"); String echostr = request.getParameter("echostr"); System.err.println("signature="+signature); System.err.println("timestamp="+timestamp); System.err.println("nonce="+nonce); System.err.println("echostr="+echostr); return echostr; } 2、接收消息。当普通微信用户向公众账号发消息时,微信服务器将POST消息的XML数据包到开发者填写的URL上。 这个URL就是我们刚才填写的URL,不过此时需要发送POST请求。
https://developers.weixin..com/doc/offiaccount/Message_Management/Receiving_standard_messages.html
我们这里以text文本为例,其他类似。这是用户发来的消息格式,我们需要解析该内容
解析需要用到的依赖
<dependency> <groupId>dom4j</groupId> <artifactId>dom4j</artifactId> <version>1.6.1</version> </dependency> <dependency> <groupId>com.thoughtworks.xstream</groupId> <artifactId>xstream</artifactId> <version>1.4.11.1</version> </dependency> 将xml解析成map方法
public static Map<String, String> parseXml(HttpServletRequest request) throws Exception { Map<String, String> map = new HashMap<String, String>(); InputStream inputStream = request.getInputStream(); SAXReader reader = new SAXReader(); Document document = reader.read(inputStream); Element root = document.getRootElement(); List<Element> elementList = root.elements(); for (Element e : elementList) map.put(e.getName(), e.getText()); inputStream.close(); inputStream = null; return map; } 我在该测试号上发送了”来来来”,可以看到,我们成功的接收到了该消息
那么如果我们想给他做出响应该如何处理呢?我们只需要按照对应格式返回给它就行,此处还是以文本消息为例。
//消息的基类 @Data @NoArgsConstructor @AllArgsConstructor public class BaseMessage { protected String ToUserName; protected String FromUserName; protected long CreateTime; protected String MsgType; } //文本消息实体类 @Data @NoArgsConstructor @AllArgsConstructor public class MessageText extends BaseMessage { private String Content;// 文本消息内容 private String MsgId;// 消息id,64位整型 } 使用工具类将消息封装格式
import java.util.Date; import java.util.Map; import com.thoughtworks.xstream.XStream; public class TextMessageUtil { public String messageToxml(MessageText message) { XStream xstream = new XStream(); xstream.alias("xml", message.getClass()); return xstream.toXML(message); } public String initMessage(Map<String,String> map) { MessageText text = new MessageText(); text.setToUserName(map.get("FromUserName")); text.setFromUserName(map.get("ToUserName")); text.setContent(map.get("Content")); text.setCreateTime(new Date().getTime()); text.setMsgType("text"); return this.messageToxml(text); } } @PostMapping("/verify") public String handChat(HttpServletRequest request, HttpServletResponse response) throws Exception{ //将微信请求xml转为map格式,获取所需的参数 Map<String, String> map = parseXml(request); map.put("Content", "你好啊"); TextMessageUtil textMessage = new TextMessageUtil(); String message = textMessage.initMessage(map); return message; } 3、自定义菜单https://developers.weixin..com/doc/offiaccount/Custom_Menus/Creating_Custom-Defined_Menu.html
创建自定义菜单需要使用到access_toekn,所以我们先去获取access_tokenhttps://developers.weixin..com/doc/offiaccount/Basic_Information/Get_access_token.html
https请求方式: GET https://api.weixin..com/cgi-bin/token?grant_type=client_credential&appid=APPID&secret=APPSECRET
此处的APPID和APPsecret是我们扫码登录进来时候上面显示的
开始定义菜单实体类,由于定义菜单比较麻烦,我们这里仅以view菜单测试,其他的类似
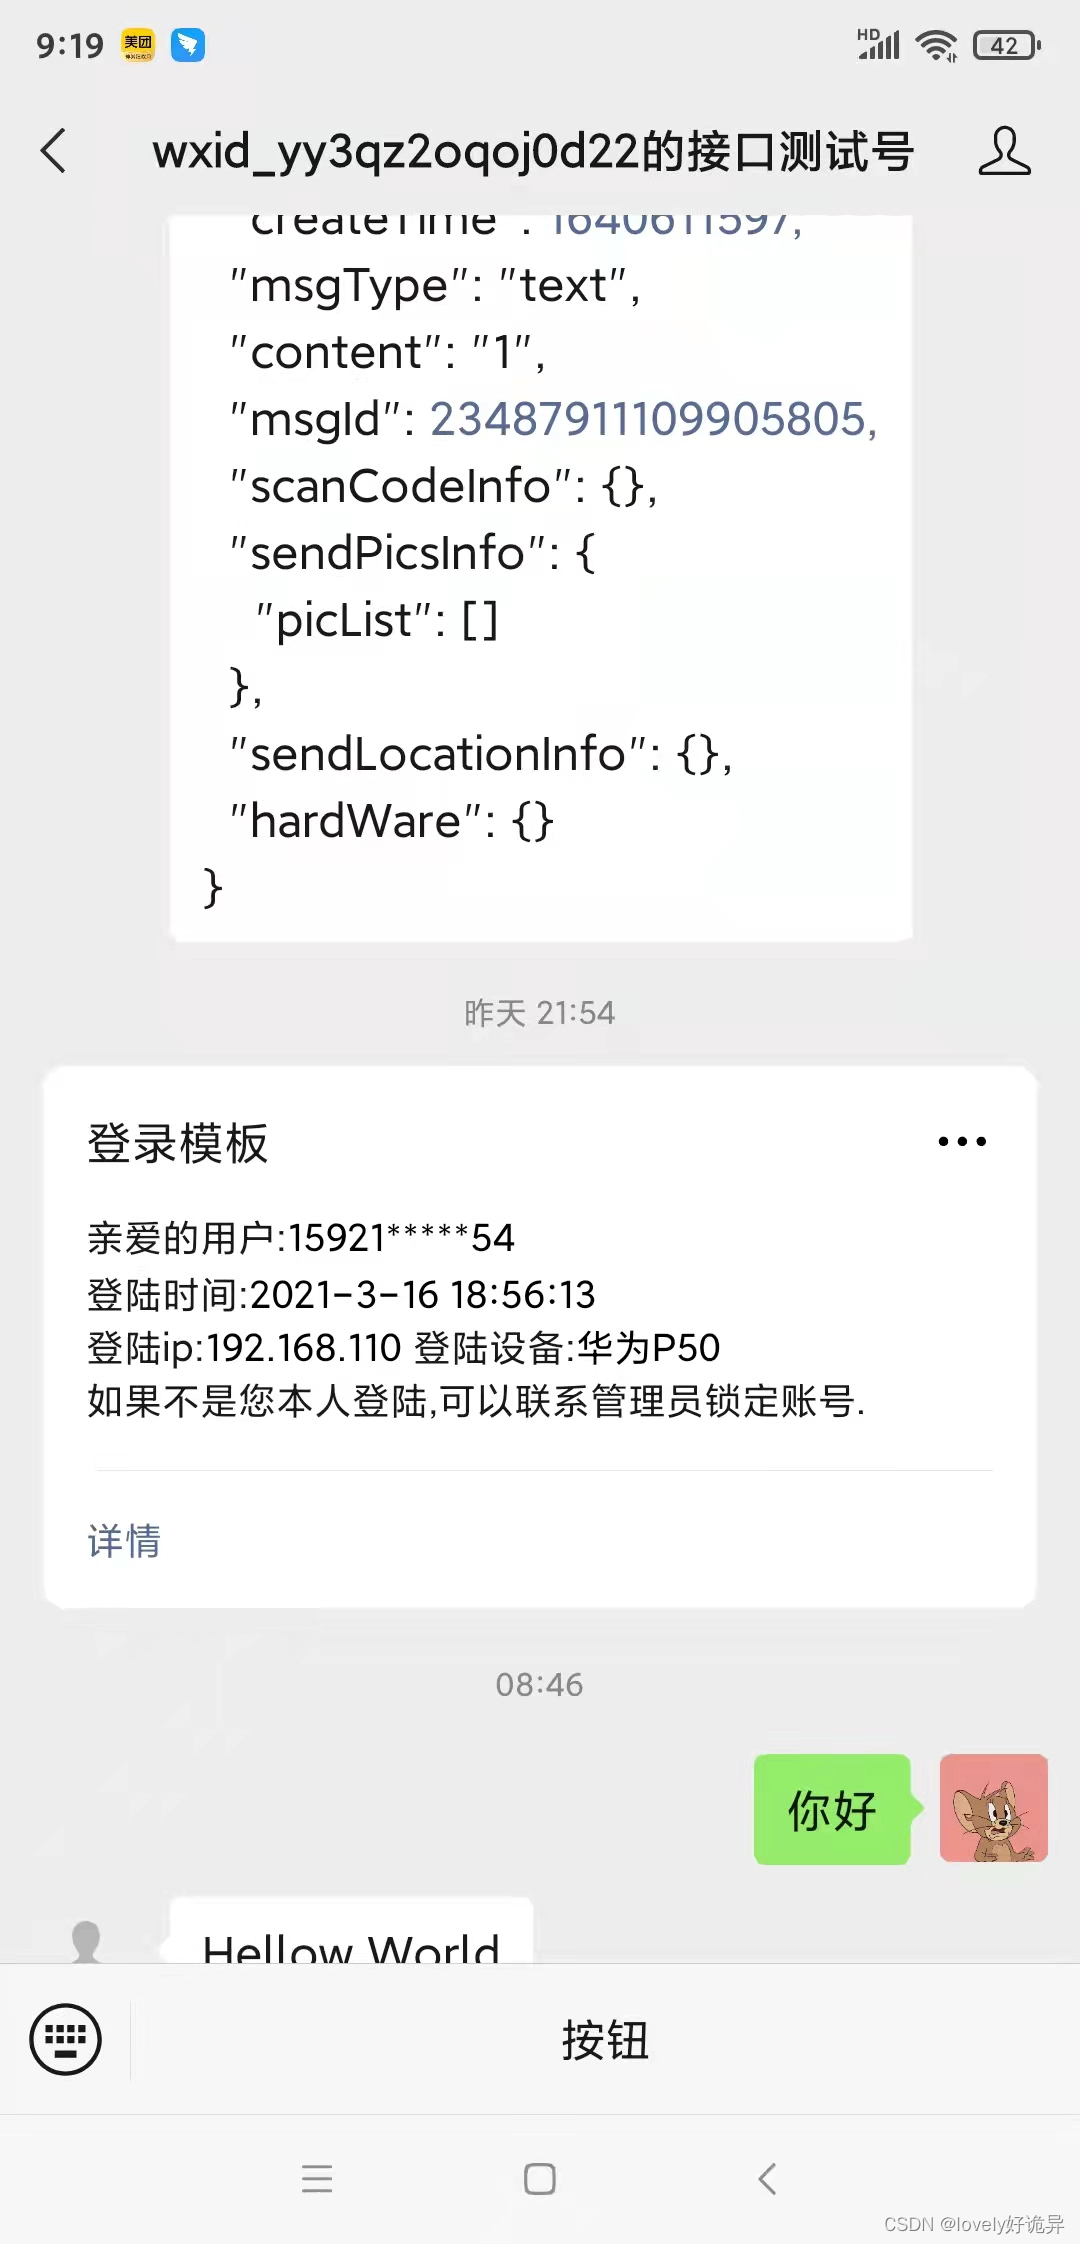
@Data public class ViewButton { private String type; private String name; private String url; } 一切准备就绪之后,发送请求,成功响应后,不会立马看到菜单的变化,需要等几分钟或者重新关注即可出现。
@GetMapping("/createMenu") public String createMenu(){ String access_token = redisCache.getCacheObject("access_token"); if(access_token==null){ //{"errcode":0,"errmsg":"ok"} 这是正确的返回格式 String tokenurl ="https://api.weixin..com/cgi-bin/token?grant_type=client_credential&appid=wxa506a7927&secret=df3b32bce92bccbbe280ea"; Map tokenMap = restTemplate.getForObject(tokenurl, Map.class); access_token = tokenMap.get("access_token").toString();//先获取access——token redisCache.setCacheObject("access_token", access_token,7200, TimeUnit.SECONDS); } ViewButton vbt = new ViewButton(); vbt.setUrl("http://www.baidu.com"); vbt.setName("按钮"); vbt.setType("view"); JSONArray button = new JSONArray(); button.add(vbt); JSONObject menujson = new JSONObject(); menujson.put("button", button); String url="https://api.weixin..com/cgi-bin/menu/create?access_token="+access_token; String rs = HttpRequest.sendPost(url, menujson.toJSONString()); System.err.println(rs); return rs; 4、其他操作,获取用户信息,用户列表等…根据文档进行操作,基本都可以成功,日后有时间再补充更新
后续来了 2021-12-28
我了方便更多的小伙伴学习使用,我们可以直接使用自己的测试号https://mp.weixin..com/debug/cgi-bin/sandbox?t=sandbox/login&token=&lang=zh_CN
下载别人写好的代码:https://github.com/gxianch/weixin-java-mp-demo-springboot-master 放入到自己项目中,修改一下配置使用
引入依赖
<dependency> <groupId>com.github.binarywang</groupId> <artifactId>weixin-java-mp</artifactId> <version>3.3.0</version> </dependency>
里面各种东西都给你处理好了,接下来我们来演示一下发送消息模板。
新增消息模板
@PostMapping("sendTemplate") public String sendTemplate(@RequestBody LoginReminderReqDto loginTemplateDto) { String phone = loginTemplateDto.getPhone(); String loginIp = loginTemplateDto.getLoginIp(); String loginTime =loginTemplateDto.getLoginTime(); String openId = loginTemplateDto.getOpenId(); String equipment = loginTemplateDto.getEquipment(); WxMpTemplateMessage wxMpTemplateMessage = new WxMpTemplateMessage(); wxMpTemplateMessage.setTemplateId(loginTemplateId); wxMpTemplateMessage.setToUser(openId); List<WxMpTemplateData> data = new ArrayList<>(); data.add(new WxMpTemplateData("first", phone)); data.add(new WxMpTemplateData("keyword1",loginTime)); data.add(new WxMpTemplateData("keyword2", loginIp)); data.add(new WxMpTemplateData("keyword3", equipment)); data.add(new WxMpTemplateData("keyword4", "河南省郑州市")); wxMpTemplateMessage.setData(data); wxMpTemplateMessage.setUrl("http://www.baidu.com"); try { String appId = wxMpProperties.getConfigs().get(0).getAppId(); WxMpTemplateMsgService templateMsgService = WxMpConfiguration.getMpServices().get(appId).getTemplateMsgService(); templateMsgService.sendTemplateMsg(wxMpTemplateMessage); return "success"; } catch (Exception e) { return "fail"; } } https://developers.weixin..com/doc/offiaccount/OA_Web_Apps/Wechat_webpage_authorization.html
官方文档在这,四部操作,拿code换token再去获取用户信息,在这里主要说一下重要点,首先要配置这个域名
也就是这里点击修改
这里是填写域名,别手欠在后面追加地址啥的
第二个重要点,要在服务端发起
那么我们的主题是微信公众号绑定我们用户,通过确认授权后走回调方法可以获取到对应的openID,如何绑定我们用户表上呢,刚才官方文档也说了不要在前端调用,所以openID不能直接返回给前端,这个时候可以通过UUID存放redis中,将UUID返回给前端,然后前端再通过调用相关将openID绑定用户表
//通过框架发起调用的 直接手写也是一样 @RequestMapping("/authorizedConnection") public String authorizedConnection() {
    String state = UUID.randomUUID().toString(); String returnRedirectUri = wxMpService.oauth2buildAuthorizationUrl(redirectUri, WxConsts.OAuth2Scope.SNSAPI_USERINFO, state); return "redirect:" + returnRedirectUri; } //调用之后的回调 @RequestMapping("/wechatOAuth") public String wechatOAuth(String code, String state) {
    // 根据用户获取openid try {
    WxMpOAuth2AccessToken wxMpOAuth2AccessToken = wxMpService.oauth2getAccessToken(code); String openId = wxMpOAuth2AccessToken.getOpenId(); // 将用户的 openid存入到Redis中 String openIdToken = tokenUtils.createToken(openId); // 跳转到vue return "redirect:"+vueAddres + "?openIdToken=" + openIdToken; } catch (Exception e) {
    return "error"; } }
免责声明:本站所有文章内容,图片,视频等均是来源于用户投稿和互联网及文摘转载整编而成,不代表本站观点,不承担相关法律责任。其著作权各归其原作者或其出版社所有。如发现本站有涉嫌抄袭侵权/违法违规的内容,侵犯到您的权益,请在线联系站长,一经查实,本站将立刻删除。 本文来自网络,若有侵权,请联系删除,如若转载,请注明出处:https://haidsoft.com/145098.html


