大家好,欢迎来到IT知识分享网。
一. 写保护
1. 目的
2. 开发环境
其他芯片以此类推
3. 程序
通过flash_if.c源程序中的FLASH_If_EnableReadProtection()函数来加密Flash。函数代码如下:
/ * @brief Enable the read protection of user flash area. * @param None * @retval 1: Read Protection successfully enable * 2: Error: Flash read unprotection failed */ uint32_t FLASH_If_EnableReadProtection(void) { /* Returns the FLASH Read Protection level. */ if( FLASH_OB_GetRDP() == RESET ) { /* Unlock the Option Bytes */ FLASH_OB_Unlock(); /* Sets the read protection level. */ FLASH_OB_RDPConfig(OB_RDP_Level_1); /* Start the Option Bytes programming process. */ if (FLASH_OB_Launch() != FLASH_COMPLETE) { /* Disable the Flash option control register access (recommended to protect the option Bytes against possible unwanted operations) */ FLASH_OB_Lock(); /* Error: Flash read unprotection failed */ return (2); } /* Disable the Flash option control register access (recommended to protect the option Bytes against possible unwanted operations) */ FLASH_OB_Lock(); /* Read Protection successfully enable */ return (1); } /* Read Protection successfully enable */ return (1); }二. 解除写保护
有两种方法可以解除Flash的写保护。
1. 建立MDK工程,程序设置为SRAM启动,在程序中解除Flash的锁定。
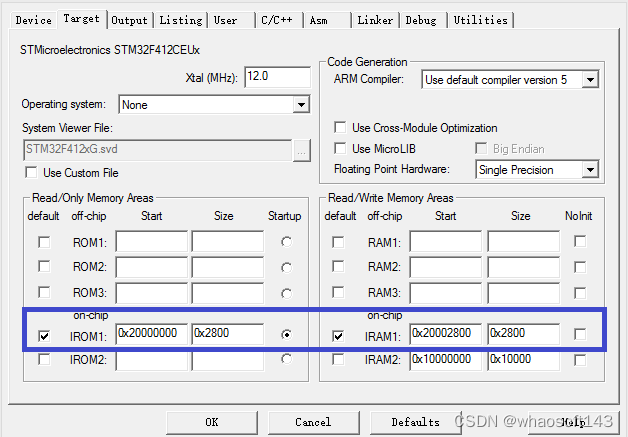
以作者最近使用的STM32F412为例,新建MDK工程,设置Target选项卡:
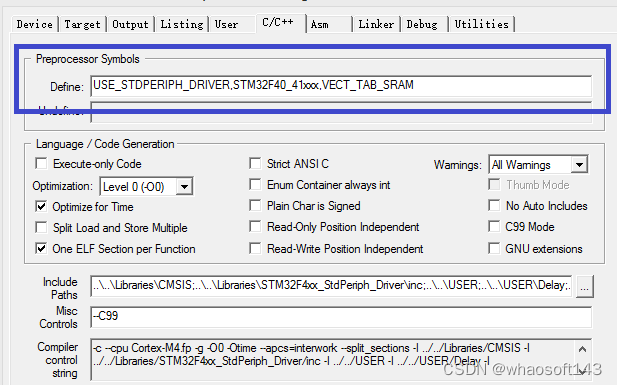
配置C/C++选项卡,根据芯片型号,包含对应宏定义;预编译宏VECT_TAB_SRAM为必添加项。
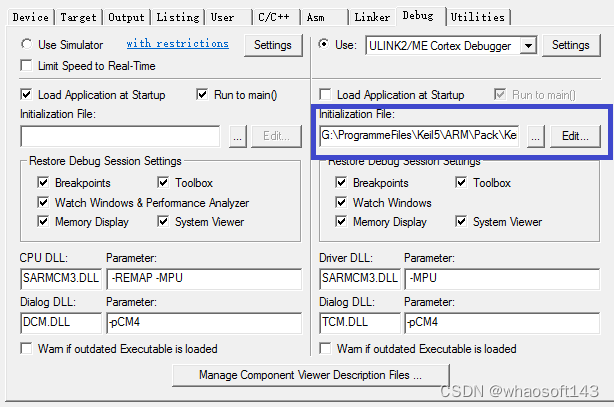
添加初始化文件路径:G:\ProgrammeFiles\Keil5\ARM\Pack\Keil\STM32F4xx_DFP\2.13.0\MDK\Boards\Keil\MCBSTM32F400\Blinky\Debug_RAM.ini (MDK的安装路径不同这里有所不同)
在main函数中调用Flash_DisableReadProtection()函数,函数代码如下:
/ * Function: Flash_DisableReadProtection * Description: Disable the read protection of user flash area. * Input: * Output: * Return: 1: Read Protection successfully disable * 2: Error: Flash read unprotection failed */ uint32_t Flash_DisableReadProtection(void) { /* Returns the FLASH Read Protection level. */ if( FLASH_OB_GetRDP() != RESET ) { /* Unlock the Option Bytes */ FLASH_OB_Unlock(); /* Sets the read protection level. */ FLASH_OB_RDPConfig(OB_RDP_Level_0); /* Start the Option Bytes programming process. */ if (FLASH_OB_Launch() != FLASH_COMPLETE) { /* Disable the Flash option control register access (recommended to protect the option Bytes against possible unwanted operations) */ FLASH_OB_Lock(); /* Error: Flash read unprotection failed */ return (2); } /* Disable the Flash option control register access (recommended to protect the option Bytes against possible unwanted operations) */ FLASH_OB_Lock(); /* Read Protection successfully disable */ return (1); } /* Read Protection successfully disable */ return (1); }2. 通过J-Flash解锁
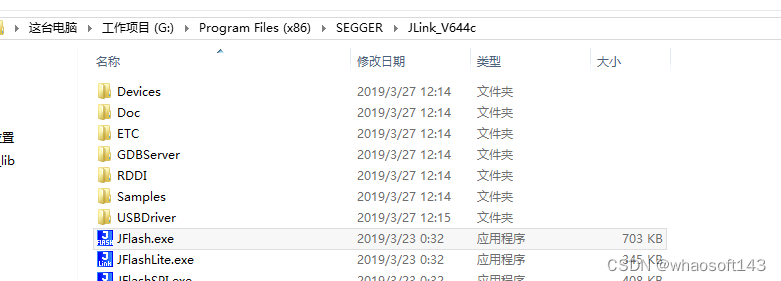
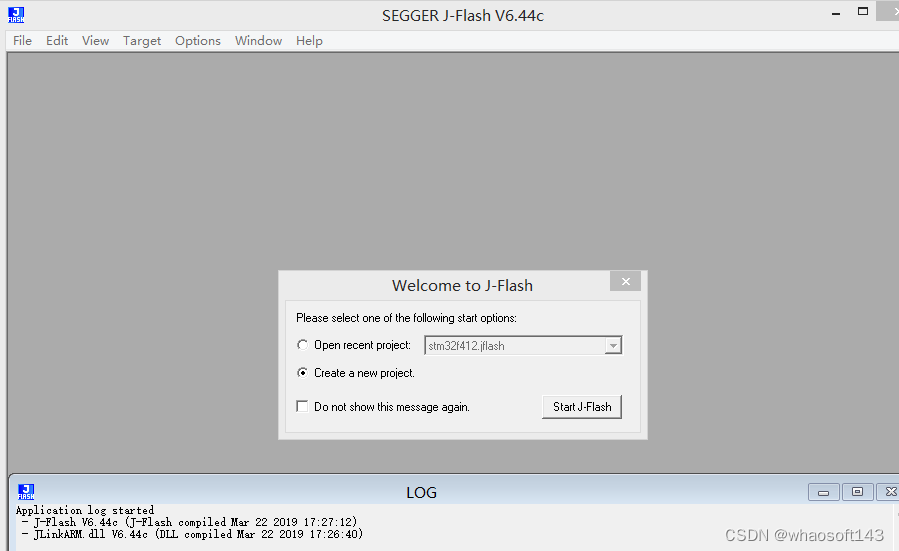
打开JFlash,选择Create a new project
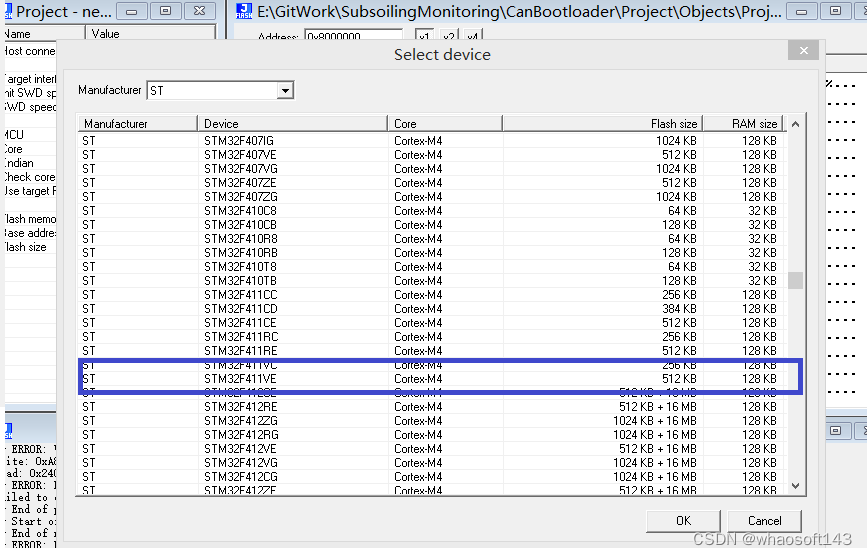
参考网上文章《STM32-读保护功能和清除读保护功能设置》,根据自己操作。如有侵权,请联系我删除
4、stm32置读保护跟清读保护操作
这个写到程序当中并执行过后,使用j-link就不能‘读出’程序了,就是‘读保护’了!没有使用此程序可以读出下载到芯片中的程序,但是如果使用了此程序就无法读出程序了。但是也无法再次烧写新的程序到芯片中了(要测试请慎重!!!!!!)
可以在主程序当中设置一按键专门清除“读保护”,一旦按下按键则清除“读保护”时芯片可以重新被烧写。
这些函数在stm32f10x_flash 里面,注意:调用上面这个库的时候需在#include “stm32f10x_flash.h”前加#define _FLASH_PROG;否则报(没有定义)错。 whaosoft aiot http://143ai.com
如果你没有做按键清除读保护这一步还有方法二补救:专门写一个清除“读保护”程序,使用RAM中运行程序的方法,运行此程序解锁“读保护”,执行后,FLASH会自动全部擦除。代码如下:
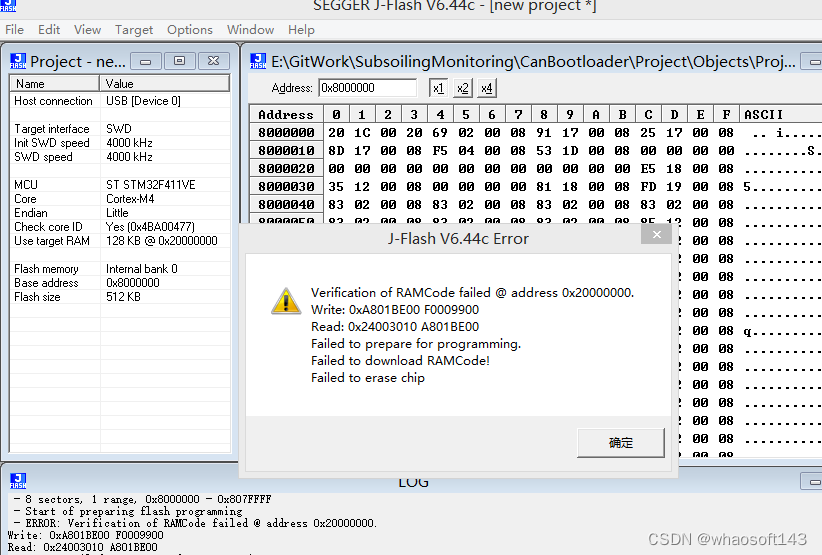
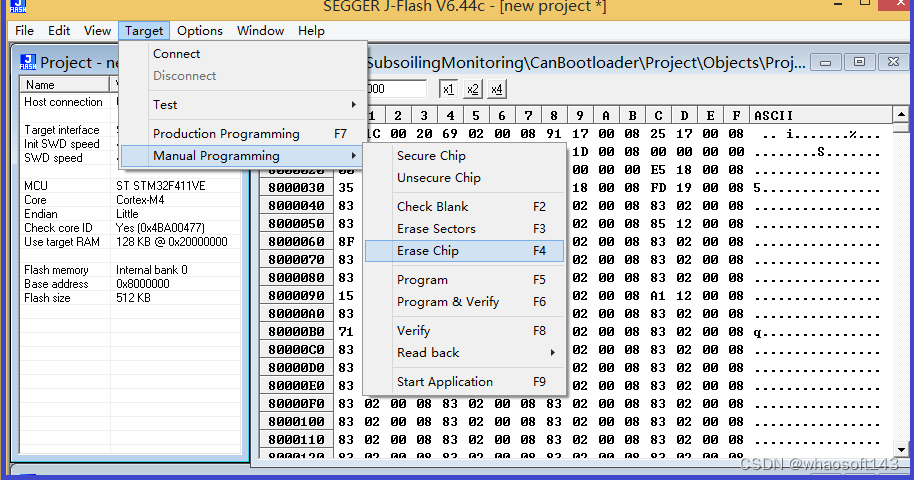
(5)运行前使用J-Flash ARM”工具,Target->unsercure chip 解除了芯片的读保护。不然会出现上述各种报错。
CPU Flash读保护使能后,仿真器调试会失败。J-LINK有个解锁菜单,需要解锁才能正常再次烧写程序。当然解锁会导致Flash内容被全部擦出。 运行
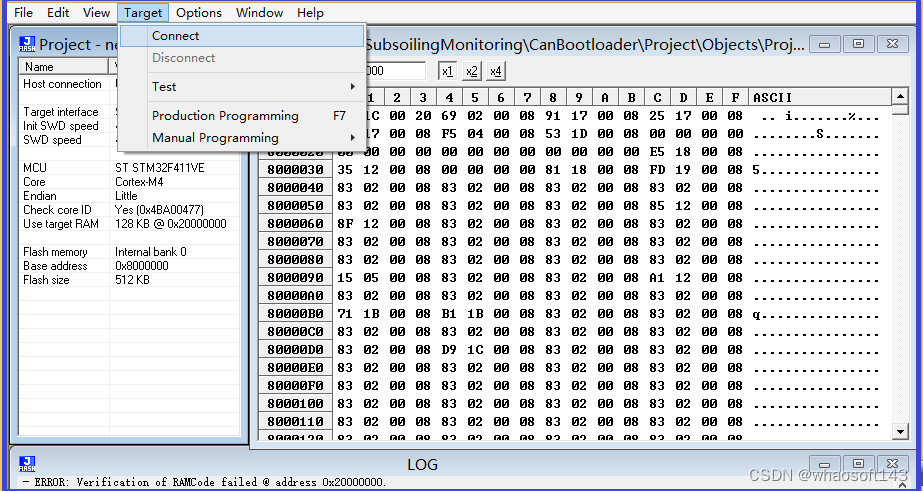
启动”J-Flash ARM”工具,Target->unsercure chip 就解除了芯片的读保护。Target->unsercure chip 后一定要上电复位,系统不复位是不行的。
三.利用KEIL将代码下载能进内存(SRAM)实现RAM启动调试代码、解除读保护(Read Protection)功能
参考文章 STM32CubeMX | 利用KEIL将代码下载能进内存(SRAM)实现RAM启动调试代码、解除读保护(Read Protection)功能_keil预定义代码读保护选项-CSDN博客
四.唯一ID做固件加密
1. 【单片机】唯一设备ID UID固件加密_uid加密-CSDN博客
2. 获取芯片MCU唯一标识符、MAC(ESP32/STM32)_使用mcu 的uid做网卡的mac地址-CSDN博客
3. 获取单片机惟一id(stm32获取单片机惟一id)
stm32惟一id:
不一样型号的stm32单片机,id不在同一地址上!具体地址能够经过用户手册中的Device electronic signature>Unique device ID register来获取。
- stm32f072:
-
uint32_t id[3]; id[0] = *(__IO uint32_t *)(0x1FFFF7AC); id[1] = *(__IO uint32_t *)(0x1FFFF7B0); id[2] = *(__IO uint32_t *)(0x1FFFF7B4);
-
- stm32f103:
-
uint32_t id[3]; id[0] = *(__IO uint32_t *)(0x1FFFF7E8); id[1] = *(__IO uint32_t *)(0x1FFFF7EC); id[2] = *(__IO uint32_t *)(0x1FFFF7F0);
-
- stm32f407:
-
uint32_t id[3]; id[0] = *(__IO uint32_t *)(0x1FFF7A10); id[1] = *(__IO uint32_t *)(0x1FFF7A14); id[2] = *(__IO uint32_t *)(0x1FFF7A18);
-
免责声明:本站所有文章内容,图片,视频等均是来源于用户投稿和互联网及文摘转载整编而成,不代表本站观点,不承担相关法律责任。其著作权各归其原作者或其出版社所有。如发现本站有涉嫌抄袭侵权/违法违规的内容,侵犯到您的权益,请在线联系站长,一经查实,本站将立刻删除。 本文来自网络,若有侵权,请联系删除,如若转载,请注明出处:https://haidsoft.com/118123.html


